Phone Case Printable Area: What Your Artwork Can Cover
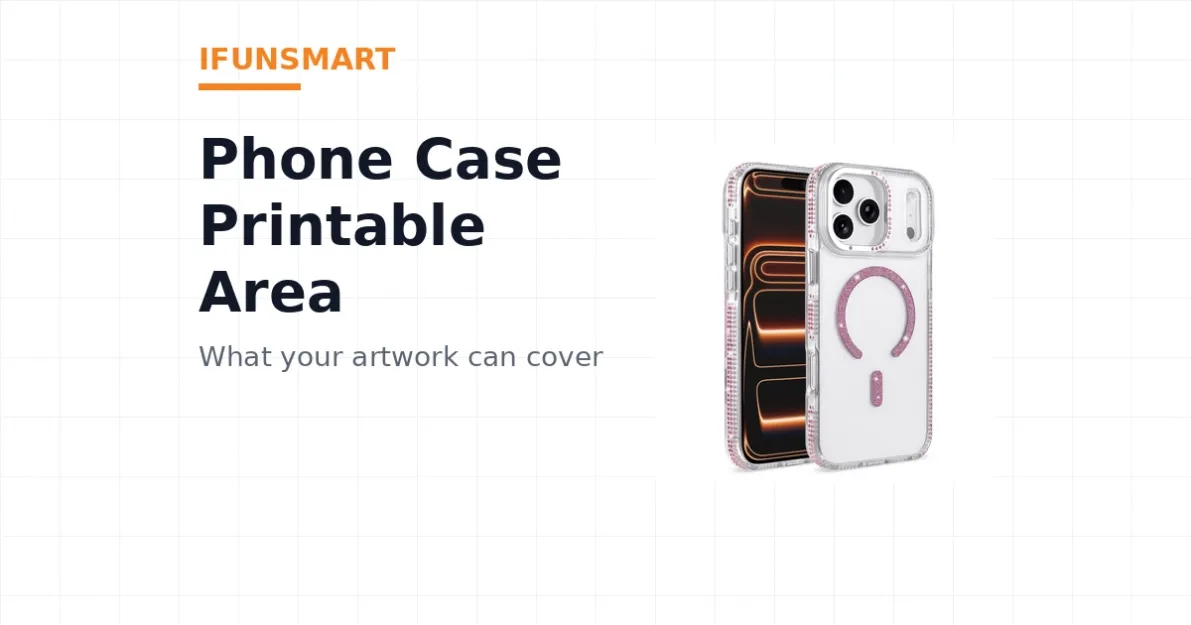
The printable area on a phone case is smaller than the back of the case. Camera cutouts, edges, rings and magnets all take space back. What each print method can do, and what to confirm first.
Short answer
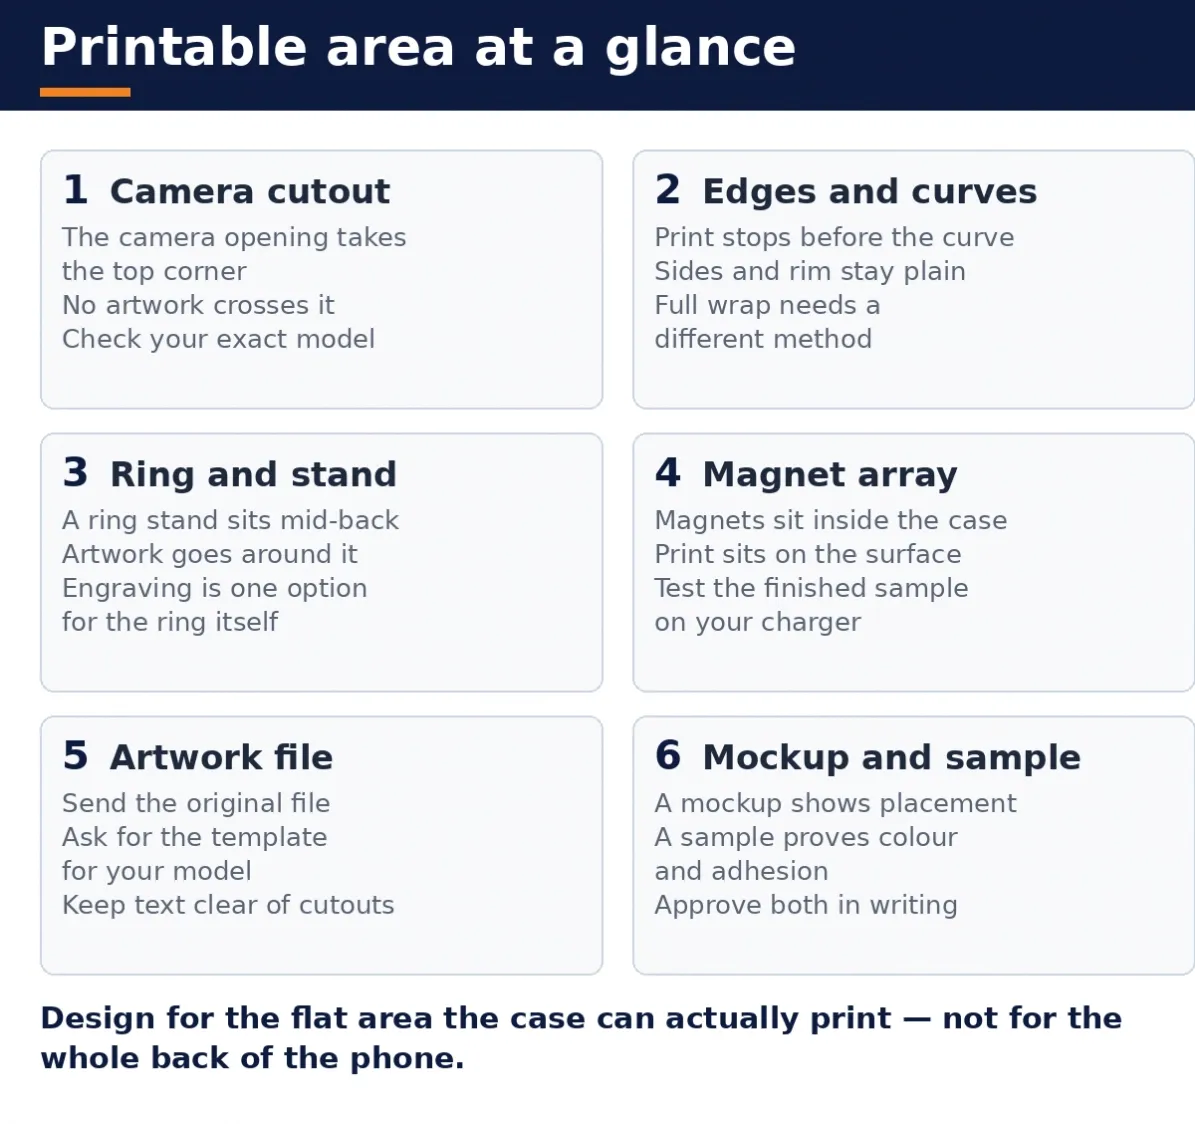
- The printable area is smaller than the back of the case
Start with the physical limits, because they decide everything else. The back of a phone case looks like one flat surface in a product photo. In production it is several zones, and only some of them can be printed.
The camera opening. Every case has a cutout or a raised frame for the camera, and no artwork crosses it. The opening is not just the lenses — it includes the frame around them and the margin the factory needs to keep the print from peeling at the edge of the cutout. On a phone with a large camera plateau, the printable area loses the whole top corner of the back. A design that puts text or a face across that corner will be cut. The first thing to ask for is the printable-area drawing for your exact model — not for the phone family, and not for last year's model, because the camera opening moves between models and the drawing moves with it.
The edges and the curve. Print stops before the case curves away from the back. The sides, the rim and the curved corners stay plain on most print methods, because ink applied to a curve does not sit evenly and does not stay put. A design that runs to the very edge of the back will lose its outer edge, or will wrap unevenly onto the curve. The print area is the flat back: it does not include the button covers, the port cutouts, the speaker holes or the grip texture on the sides. If your design needs to reach the sides — a pattern that wraps the whole case — say so at the start, because that needs a different method and a different case construction, not a bigger print area. Our decorative-finishes guide covers what to check on a sample for finishes that wrap or sit on the surface.
The ring, the stand and the kickstand. A ring stand, a pivot stand or a kickstand sits in the middle of the back, and it takes its own space. The artwork has to be designed around it — above it, below it, or in the flat area beside it. Text that runs under a ring stand is text your customer cannot read. If the ring stand is part of the design — a brand name engraved on the ring, for example — that is a separate decision from the back print, with its own method. Laser engraving is one option for a small mark on a hard surface such as a ring stand; ask us whether it fits your design and your case style.
The magnet array. A magnetic case carries its magnet array inside the case body, and the print sits on the outer surface. Printing does not change the magnets, and the magnets do not change the print — but the two have to be planned together. The print must not cover the alignment ring that centres the charger, and the finished, printed sample must be tested on the real charger and the real mount, not on a drawing. That test is in section 5.
None of these limits is a defect in the case. They are the shape of the product, and a good custom print is designed inside them. The buyer who sends a design that already respects the camera opening, the curve, the ring and the magnets gets a sample that looks like the mockup. The buyer who sends a design for the whole back of the phone gets a sample with a surprise in it.
2. Four print methods — what each can and cannot do
iFunSmart offers four print methods, and they are not interchangeable. The right method depends on the artwork, the case material and the quantity — and the method decides what the printable area looks like, how the colours come out, and how the print survives use.
UV printing. Ink is printed directly onto the prepared case surface and cured instantly with ultraviolet light. It handles full colour, gradients, photographs and fine detail, which makes it the most flexible method for artwork that is not a simple logo. The trade-off is colour matching: an exact brand colour is harder to hit with UV ink than with a spot-colour method, so a buyer with a strict brand colour should judge the colour on a printed sample, not on a screen. UV printing prints the back panel; it does not wrap the sides.
IMD — in-mould decoration. The artwork is printed on a film, formed, and moulded into the wall of the case, so the ink ends up behind the plastic. Nothing can scratch it off and nothing can fade it from the surface, because the surface is plastic and the print is underneath it. The trade-off is flexibility: the pattern is fixed when the mould runs, so IMD suits a repeat pattern or a design that will run unchanged across a production programme, not a design that changes every order.
Silk screening. A mesh stencil transfers ink onto the case, one colour at a time. It is the right method for a simple logo, a block of text or a repeat brand mark in solid colours, and it matches a named brand colour more exactly than UV printing. It cannot do gradients, and it cannot do a photograph. If your artwork is a logo in one or two solid colours, silk screening is usually the cleanest choice; if your artwork is a photograph, it is the wrong method entirely.
Heat transfer. Heat and pressure move a prepared graphic layer onto a compatible case surface. It handles broad, full-cover graphics — patterns and photographic designs that need to cover the flat back — where a direct print would stop short. The trade-off is the case itself: the surface and the structure have to accept the transfer, and the alignment has to repeat across the run. Confirm with the factory whether your chosen case style takes a heat transfer before you design for full coverage. Sublimation, the related route for print-on-demand blanks, only works on a blank made for it — ask us whether we can supply a compatible blank for your model and your press; do not assume every case in a catalogue is a printable blank, because most are not.
The method also decides the minimum order in practice, because each method has its own setup. We do not publish a custom-logo minimum order — it depends on the method, the model and the artwork — so ask us for the figure on your exact combination, in writing, before you approve the artwork. The standard minimum order for a plain case is 50 pieces per colour per model; a printed case is quoted on its own terms.
3. What to send: the artwork file and the template
A print is only as good as the file behind it, and most print problems start here — not in the factory, but in a file that was never made for printing.
Send the original artwork file. Not a screenshot, not a photo of a printout, not a file pulled from a website. The original file, in the format it was designed in, with the text still editable where possible. A low-resolution image stretched to fill the back of a case will print soft and blurred, and no print method can put back detail that was never in the file. If your artwork is a logo, send the vector version. If it is a photograph or a pattern, send the highest-resolution original you hold.
Ask for the template for your model. The factory holds a printable-area drawing for each model — the outline of the case back with the camera opening, the ring position, the magnet zone and the safe margins marked on it. Ask for it before you lay out the artwork, and lay the artwork out on that template, not on a photograph of the case. If you are ordering for more than one model, ask for the template for each one: the camera opening, the ring position and the printable area all move between models, and artwork laid out for one model will not fit another without adjustment.
Keep text clear of the edges. Small text near the edge of the printable area is the most common failure in a custom print. Keep the text inside the safe area the template marks, and keep it large enough to read at arm's length — if you have to zoom in on the mockup to read it, your customer will not read it on the case. A block of text that fills the lower half of the case is a different product from a logo with a line of text under it: the first needs a printable area big enough for the whole block, and the factory confirms whether your model has it. Do not guess the text size from the catalogue — the factory confirms it from the drawing for your model, in writing, before the sample is made.
One artwork version, named and dated. Give the artwork a version name — a file name with a date, or a version number — and use that name in every message about the order. The factory prints the version you name, and the sample is approved against that version. If the artwork changes, the version changes, and the sample is made again.
4. The digital mockup: what it proves and what it does not
Before any ink is printed, the factory sends a digital mockup — your artwork placed on a rendering of the case. It is a useful document, and it is easy to over-trust.
What a mockup proves. Placement. The mockup shows where the artwork sits on the back: whether the text clears the camera opening, whether the logo sits above the ring stand or behind it, whether the pattern is centred, whether the margins are even. If the mockup shows a problem, the problem is real, and the artwork should be moved before the sample is made. Ask for the mockup on the exact model and the exact case style you are ordering, not on a similar model — a mockup on the wrong model proves nothing about yours.
What a mockup does not prove. Colour, texture and scale. A colour on a screen is not the colour of ink on a case: screens glow, ink does not, and the case material underneath the ink changes the result. A mockup cannot show whether the ink will sit evenly on a textured surface, whether a fine line will hold, or whether the print will survive handling. It also cannot show the true size of the text — a mockup viewed on a phone screen makes small text look readable, and the same text on a real case may be too small to read. Judge the placement on the mockup. Judge the colour, the detail and the readability on the printed sample.
How to use the mockup well. Reply to it in writing, with the artwork version named, and list every change you want — moved, larger, smaller, a different colour — in one message. A mockup approved in writing is the instruction the sample is made from.
5. The printed sample: check placement, colour, adhesion and charging
The printed sample is where the print stops being a picture and becomes a product. Hold it, fit it on the exact phone, and run these checks before you approve anything.
Placement. Fit the case on the exact device and look at the back the way your customer will. Does the text clear the camera opening with a clean margin? Does the logo sit where the mockup said it would sit? Does any part of the artwork run under the ring stand, or onto the curve where it cannot be read? Turn the phone over and look at it at arm's length, not under a magnifier — that is the distance your customer will see it from.
Colour. Compare the printed colour with the brand colour you sent, in daylight, not only under office light. UV printing and silk screening reproduce colour differently, and the case material underneath the ink shifts the result. If the colour is wrong, say so in writing with the artwork version named, and ask for the sample to be made again. A colour approved on a screen is not a colour approved on a case.
Adhesion and durability. Run a fingernail lightly across an edge of the print, and across a corner of the artwork. The print should stay put. Check the edges of the print where it meets the camera cutout and the curve of the case — those are the places a print lifts first. Check the print again after the case has been fitted and removed a few times, because a print that survives the first fitting and fails the third is a print that will fail in your customer's hands.
Charging and the mount. If the case is magnetic, test the finished, printed sample on your actual charger and your actual mount. The print sits on the outer surface and the magnet array sits inside the case body, so printing does not change the magnets — but the only proof that the finished case charges and holds is the test itself. Put the phone on the charger with the printed case on, and check that it charges and that the alignment ring centres it. Put it on the mount and check that it holds. Do the same test with the ring stand open and closed, because the stand changes the balance of the case. If the case is not magnetic, this check does not apply — but the fit check does, on the exact device, with the exact model.
The ring stand itself. If the design includes a mark on the ring stand — a brand name engraved on the ring, for example — check it separately from the back print. The ring is a small, curved surface, and a mark that reads clearly on a drawing may be too small to read on the ring. Check the material of the ring as well: the factory confirms whether the ring on your case style is metal or plastic, because the engraving method and the result depend on it. Ask for that confirmation in writing with the sample.
Sample cost and timing. A printed sample is made to your artwork, so its cost and timing depend on the style, the print method and the artwork — they are confirmed per order, not published as a standard figure. Distributors receive free samples from us. Hold the printed sample, check it, approve it in writing, and only then place the bulk order. Do not approve a bulk order from a mockup alone.
6. Approve it in writing before the bulk order
The last step is the one that protects the order. Before the bulk run starts, put the whole print specification in one written message, with the artwork version named, and get the factory's written confirmation back.
What the written approval should list. The exact model and case style. The print method. The artwork version, by name and date. The placement — where the artwork sits, and what it clears. The colours, as printed on the approved sample. The ring-stand mark, if there is one, and its method. And the sample itself, identified by the date it was approved. That list is the specification the bulk order is judged against, and the document you inspect the delivery against when it arrives.
What happens if the bulk order does not match. If the delivery arrives and the print is in the wrong place, the wrong colour, or the wrong artwork version, the written approval is what makes the problem fixable. Without it, the disagreement is about a conversation nobody can prove. With it, the factory can compare the delivery with the approved sample and the approved specification, and put it right.
Keep the order in the confirmed terms. The minimum order for a plain case is 50 pieces per colour per model, and distributor and bulk orders start from 500 pieces per order in total — the 500 is the order total, not per model. A printed case is quoted on its own terms, because the method, the model and the artwork decide the setup: ask us for a written quote on your exact combination, with the print method, the artwork version and the quantity stated. Payment is by T/T or Western Union; new customers may pay a 30% deposit first, and after the goods are ready we send photos, a video and the packing list before the balance is paid and the goods ship. Those terms are part of the order, not a footnote to be settled after the artwork is approved.
A custom print is the part of the case your customer sees first, and the part that carries your brand. It deserves the same discipline as the rest of the order: a template for your model, a file made for printing, a mockup judged for placement, a sample judged for colour and adhesion, a charging test on the real charger, and an approval in writing with the artwork version named. Do those six things, and the case that arrives is the case you designed.
FAQs
1. Can the whole back of a phone case be printed?
Not on most case styles. The camera opening, the curved edges, the ring stand and the magnet zone all take space back from the flat back of the case, and most print methods print the flat back only. A design that needs to wrap the sides needs a different method and a different case construction. Ask for the printable-area drawing for your exact model before you lay out the artwork — it shows the flat area you can actually print on.
2. Which print method should I choose — UV, IMD, silk screen or heat transfer?
It depends on the artwork and the case. UV printing handles full colour, gradients and photographs on the back panel. IMD seals the graphic inside the moulded wall, so it cannot be scratched off — best for a repeat pattern. Silk screening is best for a simple logo or text in solid colours, with the most exact colour match. Heat transfer handles broad, full-cover graphics on a compatible case. Tell the factory your artwork, your model and your quantity, and ask which method fits — do not choose from the catalogue alone.
3. Does printing on the back affect magnetic wireless charging?
The print sits on the outer surface and the magnet array sits inside the case body, so printing does not change the magnets. The proof is still the test: fit the finished, printed sample on your actual charger and your actual mount, and check that it charges, centres and holds. Test with the ring stand open and closed. If the case is not magnetic, this check does not apply.
4. What artwork file should I send the factory?
The original file, in the format it was designed in — a vector file for a logo, the highest-resolution original for a photograph or pattern. Not a screenshot, not a photo of a printout. Ask for the printable-area template for your model and lay the artwork out on it, keeping text inside the safe area the template marks. Give the artwork a version name and date, and use that name in every message about the order.
5. Should I approve a bulk order from the digital mockup alone?
No. A mockup proves placement — where the artwork sits, and what it clears. It does not prove colour, texture, scale or adhesion. Judge the colour, the detail and the readability on the printed sample, fitted on the exact device and tested on the real charger if the case is magnetic. Approve the sample in writing, with the artwork version named, and only then place the bulk order.
About iFunSmart
iFunSmart has made phone cases in Guangzhou since 2010, with more than 1,000 designs, more than 500 models and a monthly capacity of more than 500,000 pieces, supplying buyers in more than 30 countries. Our magnetic lines use N52 magnets at 2700 Gauss. The minimum order is 50 pieces per colour per model, distributor and bulk orders start from 500 pieces per order in total, and distributors receive free samples. Payment is by T/T or Western Union; new customers may pay a 30% deposit first, and after the goods are ready we send photos, a video and the packing list before the balance is paid and the goods ship. Ask us for a written quote on your first order.
Contact us on WhatsApp at +86 13632248734, or click "Contact Us" now to get our full model range and latest price list!
Read more
- Custom Phone Case OEM/ODM: Logo, Colour & Packaging
- TPU vs PC vs Liquid Silicone vs Leather: Which Phone Case Material Should You Order?
- Phone Case Sampling: How to Evaluate a Sample Before a Bulk Order
- Phone Case Quality Check Before Shipment Checklist
- Phone Cases for Private-Label & E-Commerce Brands
- Phone Case RFQ: What to Send a Factory in Your First Enquiry
- Decorative Phone Case Finishes: What to Check on a Sample
- How to Read a Phone Case Quotation